Use the guides below to install, activate, or update your RA UXP Panels. Make sure your Creative Cloud app is updated before you begin.
Before You Begin: Compatibility
The RA Panels require Photoshop® 2022, v23.3 or later.
Both Windows and Mac OS are supported under a single license.
Make sure your Creative Cloud app is updated to the latest version before installing. For the most reliable workflow, use the current stable release of Photoshop.
Important: Adobe's Photoshop BETA builds are test versions that change frequently before official release. They are not officially supported and may cause UXP panel installation or compatibility errors, or keep wasting your time by using up your license activations: Panel keeps asking to reset activations. Use the current stable release instead.
Step 1: Download & Unzip the Installation File
Download the installation package (ZIP file) from your Member Account → Downloads tab and unzip it in the Downloads folder (Mac) or the root folder of the C: drive (Windows).
Important: Run the installation file (.CCX) from the same drive where Adobe Photoshop and the Creative Cloud app are installed — typically the C: drive on Windows or Macintosh HD on Mac. Adobe will only recognize the .CCX file if it is located on the same drive as your Adobe programs.
Step 2: Double-Click the CCX File
Double-click the MUA_[version].CCX file to open the Adobe Creative Cloud → Manage Plugins dashboard. The first prompt notifies you that the panel is a non-marketplace plugin — press Install.
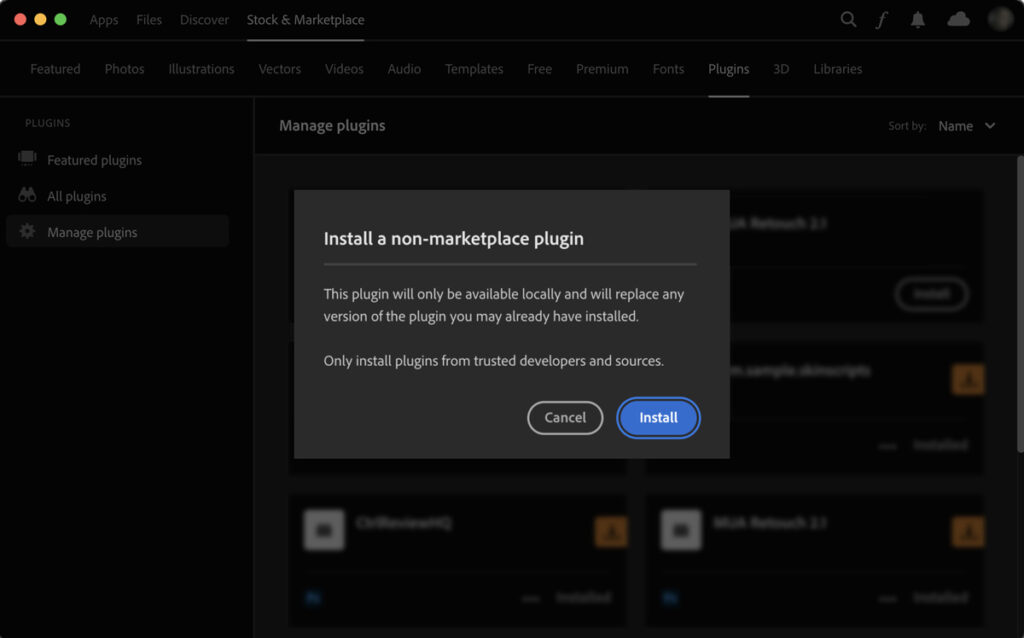
A non-marketplace plugin simply means it is not from the Adobe Marketplace. This installation makes the panel available on the current computer only — install it separately on each machine. Your license allows each RA Panel on two computers. Contact Support if you need to use your panel on more.
Step 3: Install the RA Panel Plugin
Press OK on the standard third-party developer notification shown for all plugins that are not on the Adobe Marketplace.
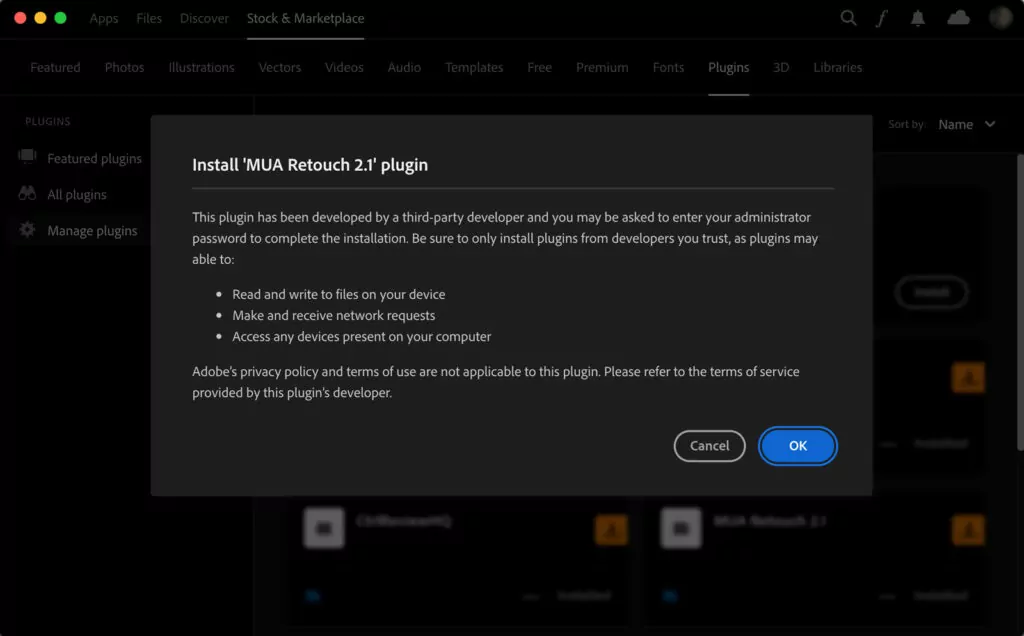
Step 4: Open Adobe Photoshop
Click Open Photoshop. The panel should appear by default; if it does not, find it under the Plugins menu.
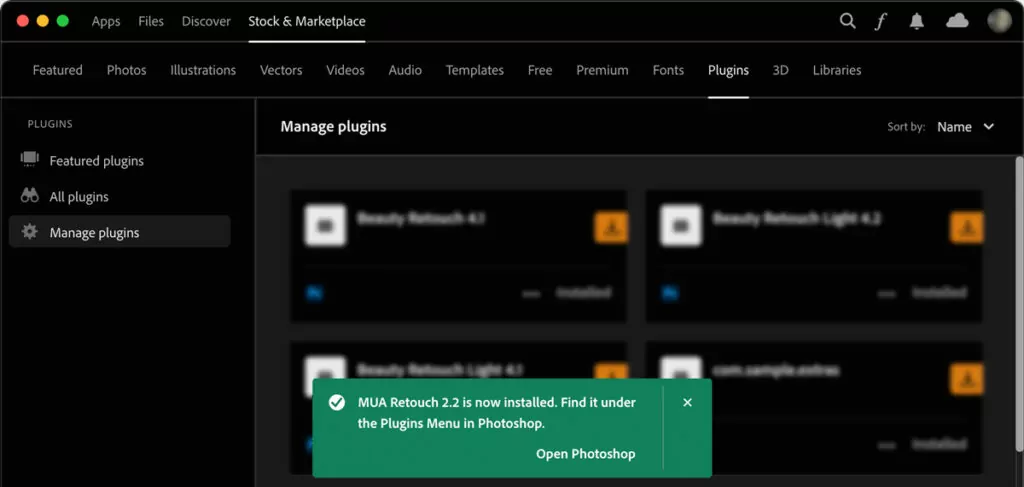
Step 5: Activate Your License
In Photoshop, enter the email address associated with your Member Account and press OK to activate your Software Product License.
You will find the panel under the Plugins menu.

If your email is rejected, you may have used up your two activations. Learn how to reset your panel activations.
Step 6: Activate the Panel's Custom Brushes & Tool Presets
Once the panel is installed, activate its custom Brushes and Tool Presets. You only need to install and activate them once.
Our Tip: Panel Placement
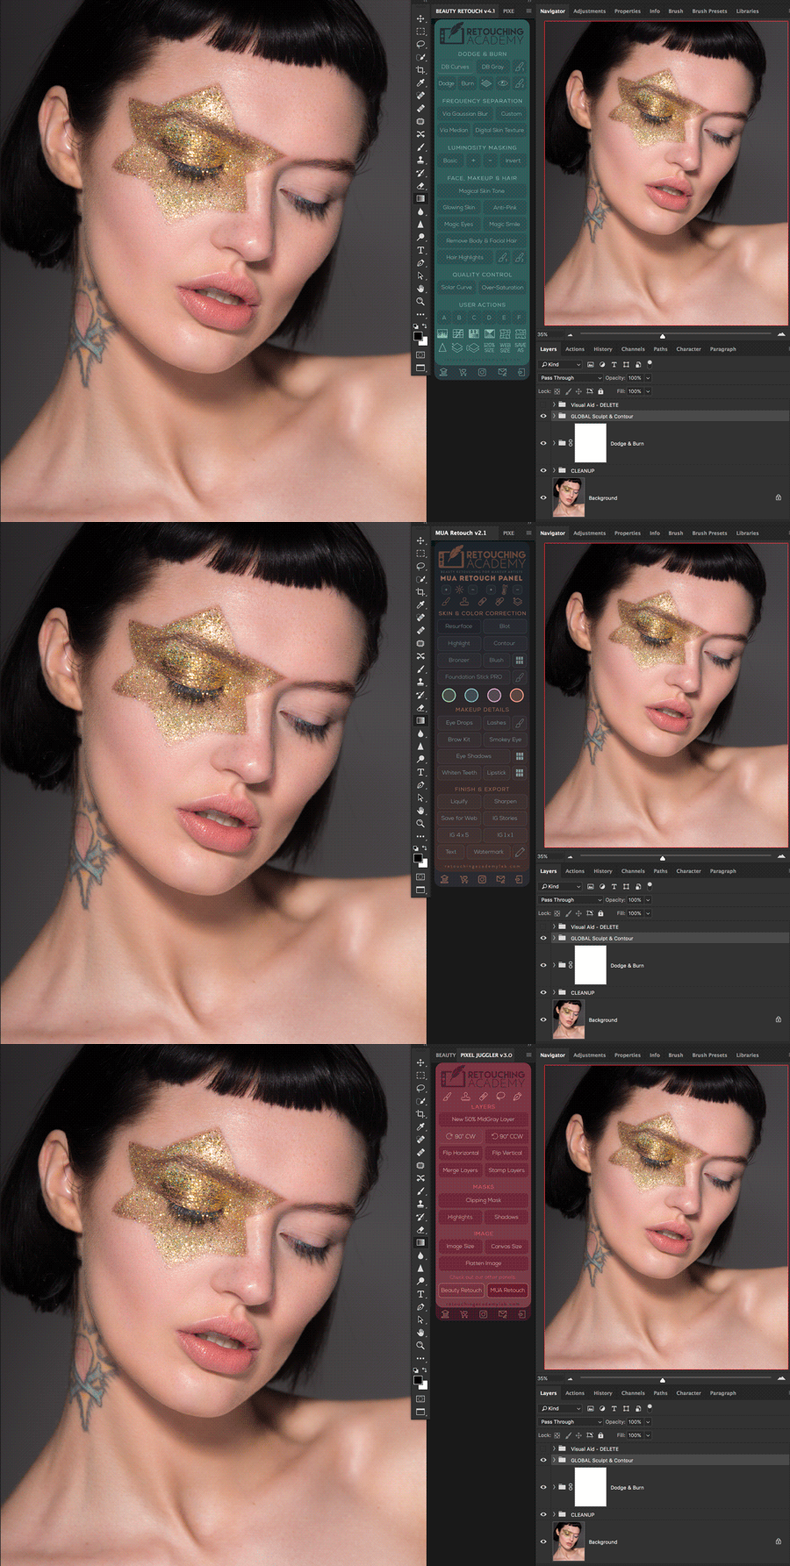
You can drag the panel anywhere on your screen. We recommend placing it on the right side of your workspace, next to the Toolbar, as shown in our video tutorials.
When working on a smaller screen, stack your panels one behind another so you can flip through them as needed. On large screens, place the MUA Retouch and Beauty Retouch panels together at the top of the screen, with the Pixel Juggler panel below them in the lower half.
Need Help Installing?
If you run into any issues, see the UXP Panels Installation Troubleshooting guide. The most common issue is an outdated Creative Cloud app — make sure it is updated to the latest version and relaunch it before installing.
Dedicated Support Team
If the FAQ does not resolve your issue, please contact our friendly Support Team: Submit a Support Ticket.